Uploading Images to Strapi in Vue (tutorial)
Looking for a better understanding of the Strapi docs in regards to uploading photos? Look no further! In this tutorial, we’re going to cover uploading images to Strapi with Vue. In addition, we’re going to go over why forms are awesome and how we can use something called FormData to send along our form, including text fields and files!
This tutorial will spin up a new local instance of Strapi. If you want to learn how to then deploy it online, then check out the earlier tutorial on setting up Strapi and linking it Mongo Atlas and Heroku. This tutorial is going to use Yarn, Vue (and the Vue CLI), and MongoDB, so grab those if you don’t have them already. Without further ado…
Setup Strapi Locally
Fire up your favorite shell/terminal/etc, go to the directory you want to save this project and…
mkdir strapi-app-image
cd strapi-app-image
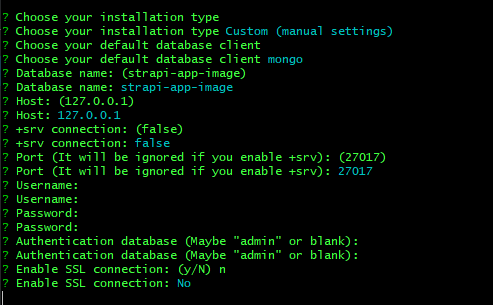
yarn create strapi-app .Choose manual installation
Fire up Strapi with yarn develop and then go to localhost:1337/admin and create an admin user. Click on Content Type Builder on the left panel.
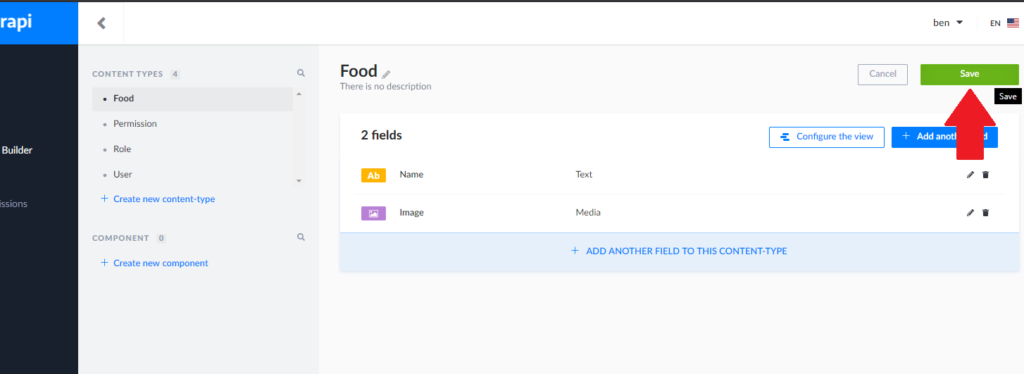
Make a new content type called “food”. Choose a text field and give it the value “name” and a media field and give it the value “image”. Save your content type. The server will then restart.
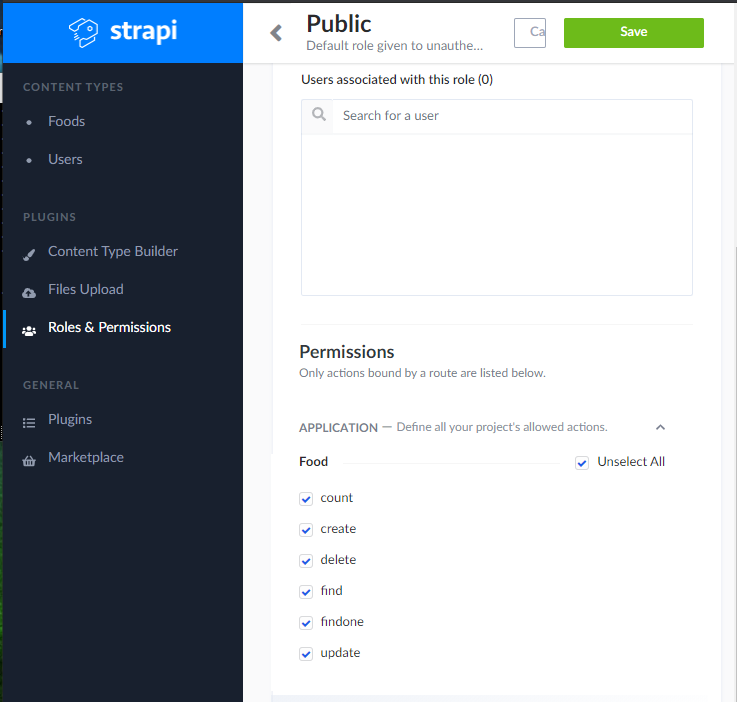
To make sure we can post to that route, go to Roles & Permissions > public and then click on “select all” for food. Make sure to save it!
Setting up our Vue app
Let’s start our Vue project. Go up to where you want to save the project and run vue create image-upload-frontend and choose default for the setup. cd image-upload-frontend once it’s done installing. npm i axios to install axios (which is how we’ll be calling our Strapi app). Open your favorite editor (for me, I’m using VS Code, so I can type code . to open it up in my current directory). Let’s first go to src / components / HelloWorld.vue and gut it.
Now to make our form! Forms provide a bunch of simplicity, but we want to make sure they’re not going to actually POST whenever they’re submit input is clicked, so let’s start that up.
Adding our form
<template>
<div class="hello">
<form @submit.prevent="sendToStrapi">
<input type="text" name="name">
<input type="file" name="image">
<input type="submit" name="Submit">
</form>
</div>
</template>
<script>
export default {
methods:{
sendToStrapi(){
console.log("sending will take place here!")
}
}
}
</script>
<style scoped>
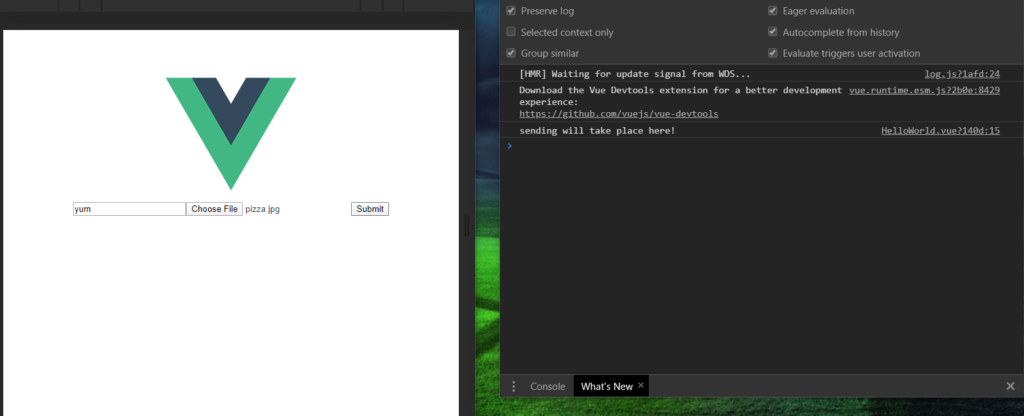
</style>Above we’re just making a form with two inputs. Keep in mind that both the ones that are going to get data have a matching name with our Strapi Content Type for food! Additionally we need to specify that we’re going to prevent the default action (posting somewhere) when the submit is clicked. Before we run our app, let’s disable ESLint so it doesn’t complain about logging to the console. At the top of our component let’s add /* eslint-disable */ Let’s go back to our terminal for our vue app and run npm run serve. Open up your dev tools and check out the console.
Now let’s take a look at the Strapi documentation and use some of the examples to send data to our backend. We have a form, but don’t have easy access to it. Let’s change that by adding a ref="uploadForm" attribute to the form. We can then get that in our method by saying this.$refs["uploadForm"]
Why I like forms (for Strapi)
I’ve had a change of heart recently about forms in regards to Strapi. Before I’d just grab what data I needed from inputs, toss it into an object and scoot it up the wire, but I realize that input children of forms are really easy to organize for Strapi. The name can correspond with the Content Type name for Strapi, which makes it easy to use out of the box. Uploading images with Strapi in Vue is also quite difficult unless you have the data wrapped in a FormData object (Strapi requires it)
Wrapping up our code
Let’s change our sendToStrapi method to grab that form element, we’re going to create a new formData variable and assign it to a new instance of FormData(). This part is required by Strapi in order to send files (as per the docs). We’re going to setup an empty data object, and then get the form elements with form.formElements (form’s my variable name pointing at that form HTML element). We’re then going to loop over each of those elements. If the element isn’t a submit or file, we’re going to add a new key/value pair to the data object. If it is a file and there’s only one, then we’re going to append it to our formData instance with the following args. files.(thecurrentelement.name), thecurrentelement.files[0], and thecurrentelement.files[0].name which is a little confusing.
...
methods: {
    sendToStrapi() {
      let form = this.$refs["uploadForm"];
      let formData = new FormData();
      let formElements = form.elements;
      let data = {};
      formElements.forEach(currentElement => {
        if (!["submit", "file"].includes(currentElement.type)) {
          data[currentElement.name] = currentElement.value;
        } else if (currentElement.type === "file") {
          if (currentElement.files.length === 1) {
            const file = currentElement.files[0];
            formData.append(`files.${currentElement.name}`, file, file.name);
          } else {
            for (let i = 0; i < currentElement.files.length; i++) {
              const file = currentElement.files[i];
              formData.append(`files.${currentElement.name}`, file, file.name);
            }
          }
        }
      });
      formData.append("data", JSON.stringify(data));
      axios.post("http://localhost:1337/foods", formData).then(res => console.log(res));
    }
  }
...
Now we can add a file and name to our form and…
Uploading image to Strapi with Vue: Complete!
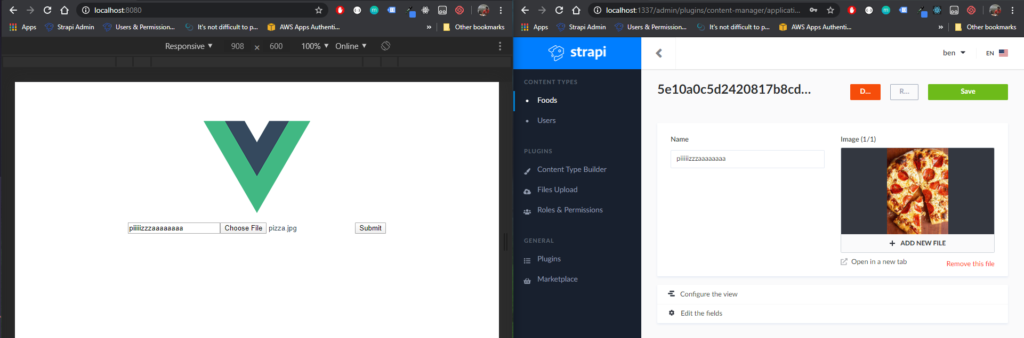
Our data (name) and our image are now sitting pretty in our Vue instance! Let’s break down some of the more tricky parts before concluding. First, when you create a Strapi content type (for the beta at time of this writing), it’ll capitalize and pluralize it. The capital doesn’t matter, but the plural does! Make sure you check your routes. Also, you need to have FormData to post files to Strapi, otherwise you’ll get a 200 response, but no images. I hope this post helped you on uploading images to Strapi with Vue! If you have any questions, feel free to put them in the comments below and I’ll get back to you as soon as I can.
This post saved my sanity. Thanks Ben!